VT Software to Upgrade eVic Primo 2.0
This VT software is for upgrading your eVic Primo 2.0 to the latest Firmware Version. Your temperature control device will be always up to date because of upgradeable firmware.
What’s special in Version 4.05?
Preheat Function
The eVic Primo 2.0 comes with the preheat function, allowing to start firing at a high output for a few seconds to warm up.
This is especially an essential when using an RDA, RTA, ceramic heads and so on.
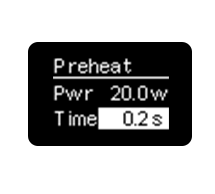
Simply long press the fire button and “+” button simultaneously for a few seconds to enter into the menu. When it is flashing, press the “+” button 2 times so that you can set the preheat parameter.
Press “-” button first then press the fire button to switch between preheat power and duration. Press “+” or “-” buttons to regulate. Long press the fire button to confirm.
RTC (Real Time Clock) Display
RTC – Real Time Clock enables eVic Primo 2.0 to present you time in two kinds of method. In general interface, it presents digital clock and analog clock . The screen will display analog clock in standby.
Custom Logo
You can upload custom logos onto your eVic Primo 2.0 . The logo should be single color bmp. picture with limited 64*40 pixel.
How to achieve?
1. Download the latest VT Software for eVic Primo 2.0 and upgrade your device up-to-date.
2. Upload the logo you prepared.
3. Press the fire button and “+” button simultaneously for a few seconds to enter into the menu. Press the “+” button again to enter into the Custom Logo on/off menu.
4. Just press the fire button to confirm, then you’re ready to enjoy it.
Reverse charge
The eVic Primo 2.0 can be served as a power bank to charge other e-cigarettes or electronic devices.
How to achieve?
1. Download the latest VT Software for eVic Primo 2.0 and upgrade your device up-to-date.
2. Install the new reverse charging (RC) adapter on the 510 connector.
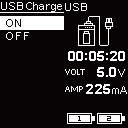
3. Press the fire button and “+” button simultaneously and then press “+” button 3 times to enter into the USB Charge menu. Choose on to activate reverse charge function.
4. Press the fire button 3 times and then press “+” button to switch between different modes. Choose the USB charge mode, connect with your electronic devices via the USB cable to charge.
